Basic Hardware Example
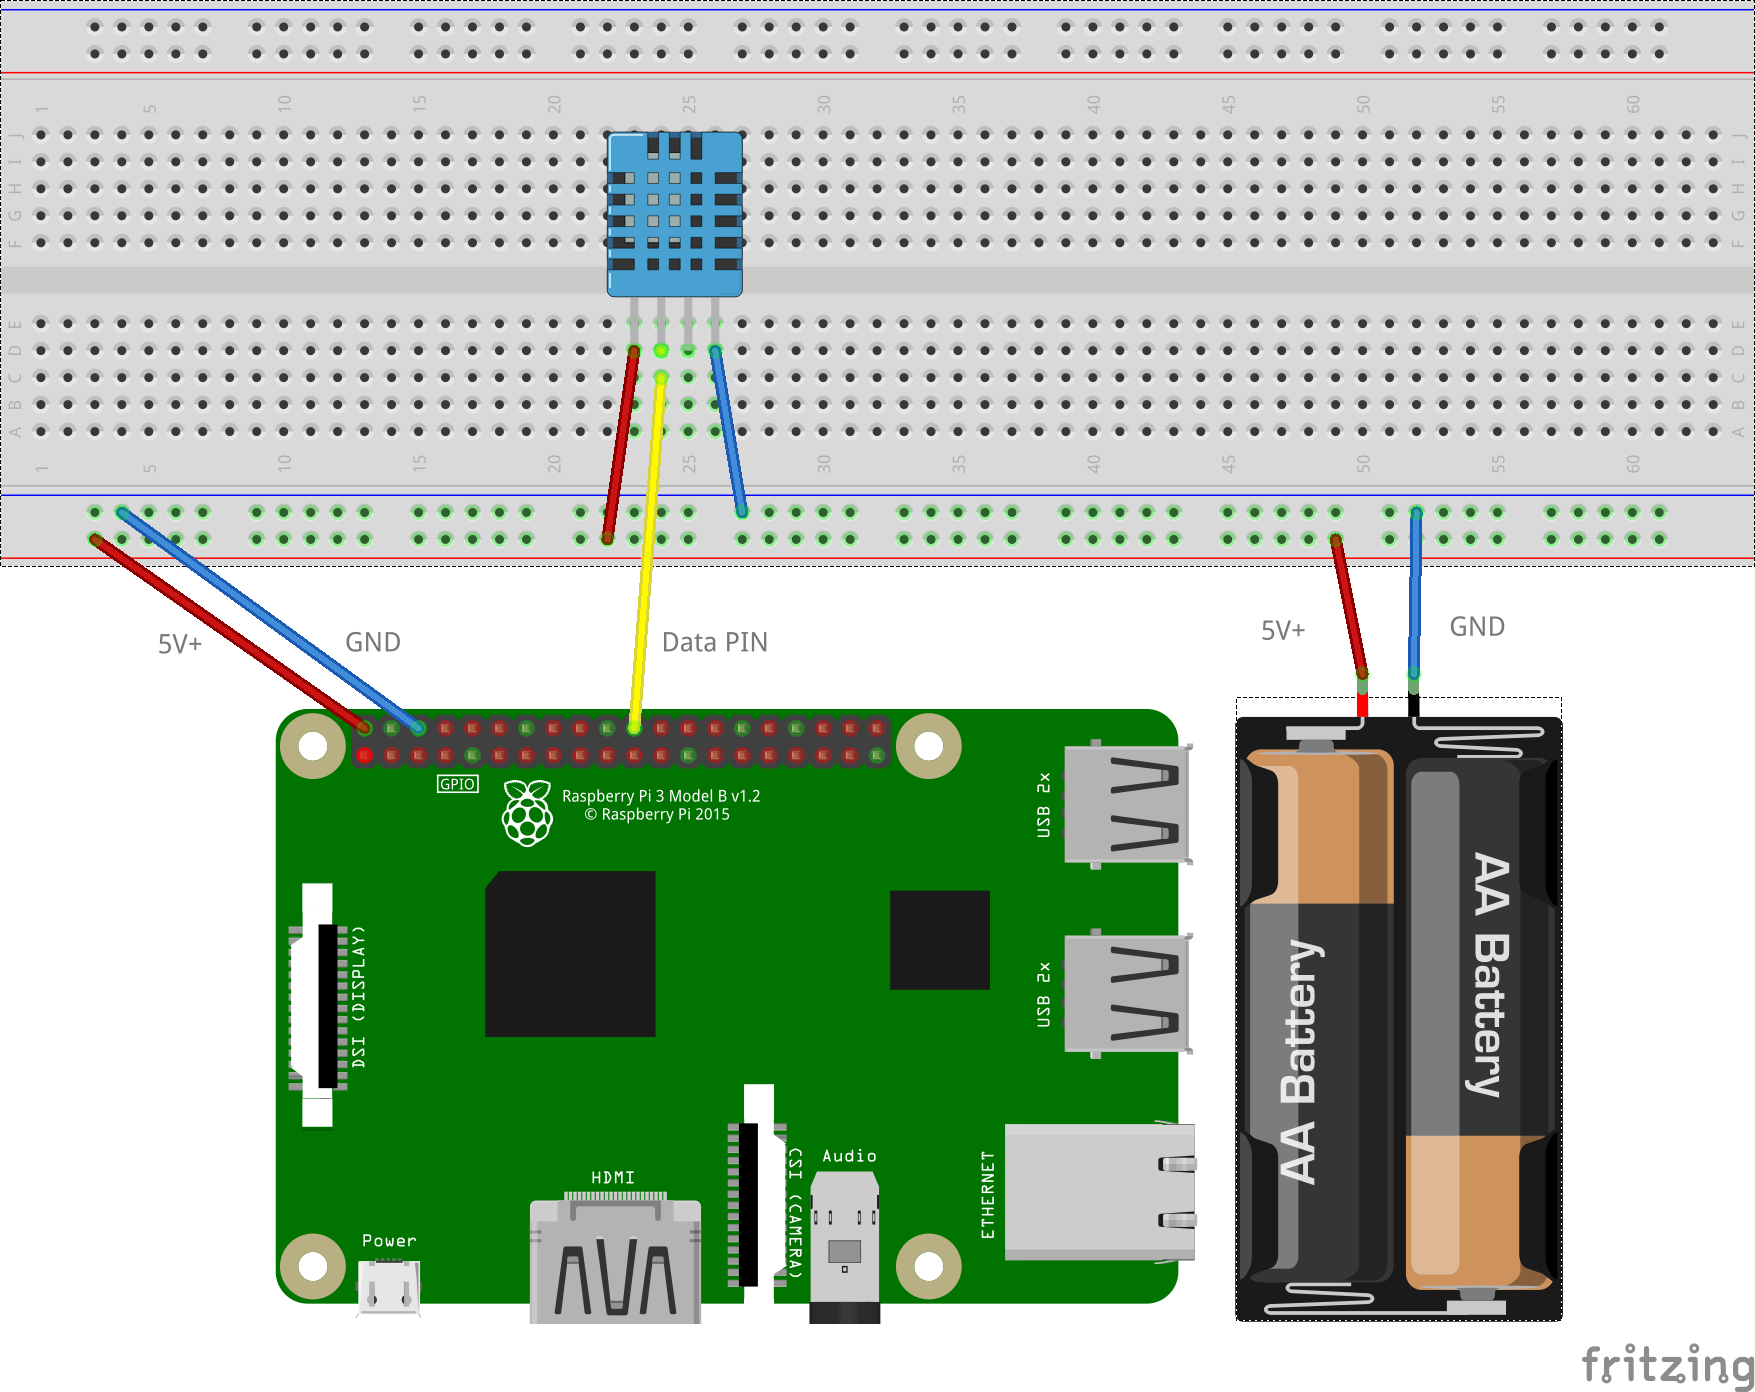
After we have installed MudPi and learned about configuration we are ready to hook up some real hardware. Lets begin with a basic setup to get started with a DHT11 Humidity sensor hooked up to a raspberry pi on GPIO pin 25.

Configuring MudPi for the Hardware
Using an editor of your choice edit the mudpi.config file located in the root of the MudPi installation at /home/mudpi/core/mudpi. It uses a JSON object for the formatting but also supports YAML. Here is an example of a config for the hardware example above.
{
    "mudpi": {
    "name": "MudPi Weather Station",
    "debug": false,
    "unit_system": "imperial",
    "location": {
        "latitude":40,
        "longitude":-20
    },
    "events": {
        "redis": {
            "host": "127.0.0.1",
            "port": 6379
        }
    }
    },
    "sensor": [{
        "key": "dht_sensor_D25",
        "interface": "dht",
        "pin": "D25",
        "model": "11"
    }]
}
Make changes and add any additional options you need. Once you are finished save the file and you are now ready to run MudPi. If MudPi is running in the background reload it using
sudo supervisorctl restart mudpi
If you do not have MudPi running in the background you can learn about that in the next step.
Next Step >| ✔ | Preparing the SD Card | 4:02 |
| ✔ | Booting Up & Configuring Raspbian | 4:48 |
| ✔ | SSH and SSH Keys | (Video Coming Soon) |
| ✔ | Updating Python on Raspbian & Installing Useful Packages | (Video Coming Soon) |